

Guangdong Freeman Outdoor Co., Ltd.
Latest products
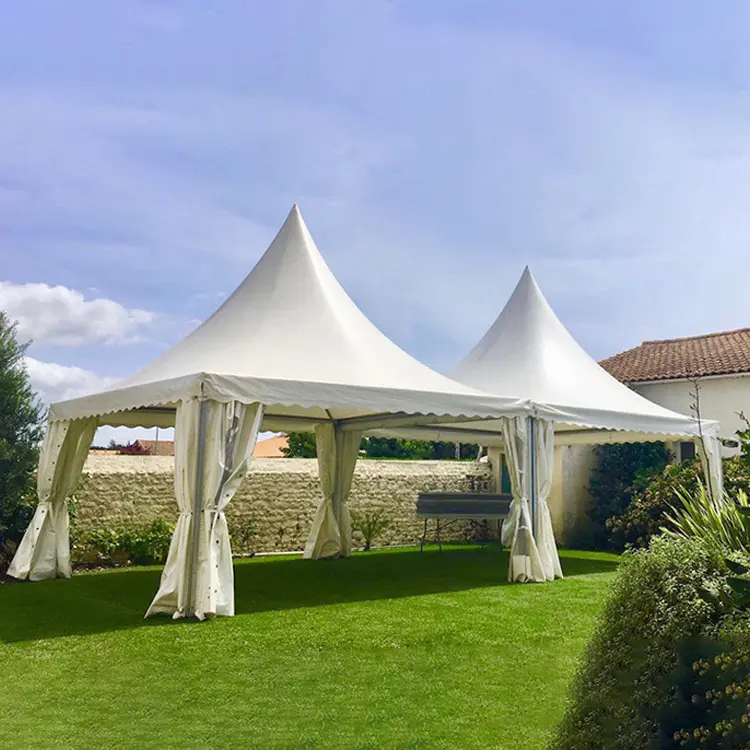
a big, luxurious stretch tent for burning man
by:FeaMont
2020-03-07
For the Burning Man 2016, the luxurious Rangers built a large public stretch tent that we used to relax, throw activities and display artwork.
This year, my burning people camp, the luxurious Wanderers, wanted to create a unique central structure as a place to hang out for relaxation, a public space for activities, and a canvas for projected artwork.
Of course, the Burning Man also has its own unique design limitations.
The structure must be easy to pack and move to the desert, relatively simple to assemble and reasonably cheap (
We only use it once a year)
And, most importantly, stability in a high structure
Wind environment.
After many iterations, our camp has designed a five-angle stretch tent structure.
Design features: we have completed all CAD designs of the structure in Autodesk Fusion 360 (
Screenshot as shown in Figure).
There are three key engineering challenges for the structure.
The choice of antenna towers is relatively straight.
We looked at the options and finally ordered a 20\' AME-
Tower of month DXEngineering. com.
Delivery takes about 2 weeks.
We bought two 10\' segments (
Tied together.
And hinge base (
20\' section bolts on hinge installation).
To make the assembly easier, we made a spring connection to the hinge base.
6 Pre-hinge base
Drilling slightly larger than lag screws.
When the antenna arrives, we quickly set it to test run. It\'s huge! : )We over-
Hardware was designed.
Everything comes from electronics. rigging.
Similarly, the goal is to be the main load-bearing element (
Pedestrian, anchor, Tower)to fail last (
And curtain fabric failed first).
Everyone has: we sorted out everyone\'s route before going to the beach.
This includes rotating the steel cable and connecting the cable to the swivel buckle and hook. To really over-
Engineer thing, I decided to use 3 24 \"lag screws per Guy line.
Of course, in order for 3 anchors to support 1 guy line, 3 anchors need the same support load.
To this end, I decided to make the \"ground anchor\" due to the lack of better terms \"--
This is simple flat steel extrusion with 3 lag screw holes.
The guy line is connected to the anchor using two steel chains that pass through the center lag screw.
To build the ground anchor, I cleaned up a long carbon steel squeeze that happened to be drilled into it every once in a while.
I can cut that piece into 4 anchors with a horizontal band saw.
For the fifth anchor, I found a piece of scrap squeezed by rectangular steel (
It seems to be stainless steel? )
And drilled 3 holes in it.
The tower of our central structure is triangular, but we are trying to connect 5 lines.
Unfortunately, this means that these people can be installed on the tower without 5 equal distance points. Fortunately -
I found a giant water jet cutter at Pier 9.
I have designed a steel mounting plate with 5 large holes to hook on the guy line and 5 small holes to connect to the top of a 5-block shading cloth.
Use 3 bolts to securely secure the plate to the top of the antenna tower.
Of course, we need the lighthouse at the top of the tent to guide our vigilant souls back to the camp.
Given that we are luxurious Wanderers, we will naturally go with a 4 \'high diamond.
To reduce the wind load, I decided to design the diamond into a thin frame and then light it up with an LED light strip.
The downside of this design is that you can\'t see it during the day.
I built diamonds through 3D print joints that use 1/4 \"wooden pin connections.
The 3 center joints are connected using a threaded rod with a diameter of 4 \'3/8 long.
Stick the 3/8 \"Bolt to 3 center joints, allowing the joint thread to be attached to the rod.
The rest of the joints and pins were then assembled.
The pins are mounted on the joints with a pressure fit, but we also pasted the joints on site to make sure they are not separated.
The entire diamond assembly is fixed on the top plate with two nuts. The connector is 3D printed with ASA on Stratasys Fortus printer.
They can definitely print with cheaper printers like Ultimaker or Makerbot.
I went to the local discount fabric store and looked into various options.
I bought about 40 yards in white.
Way stretch shade fabric costs about $5/yd.
Fabric is the more resilient way I look forward
About 70% in two directions-
We ended up using only about half of what we bought.
We use the \"no stitching method\" to connect the fabric.
We use marble instead of coins.
To reduce waste and cutting, we have designed a triangular shadow pattern.
Each five-angled face is made up of four triangles.
Before going to the beach, we cut the shade fabric with marble method and assembled them into five corners.
After the guy line, Diamond, tower, anchor and sunshades were prepared, we were ready to go to the beach.
Before we set up the tower, it was very easy.
Three people used ropes, and three people used ropes to walk the tower into the plate.
We then bolt the base in place.
Next, we anchor the guy line on the ground using anchor hardware, lag screws, port cargo impact drivers and a lot of patience.
The ground with the head 18 \"inch is a breeze, but the last 6\" is a real pain.
We ended up having to put our entire weight on the driver to get the last 6-inch lag screw.
To connect the sunshades, we connected a 1/8-long steel cable around the structure 8 feet from the ground.
1/8 \"week long cable is connected to 1/4\" U disk for peopleclamps.
We used a swivel buckle on the 100 \'cable to make it nice and tight.
After putting the perimeter cable and the U-shaped clamp in place, we use some paracord to connect the bottom point of the triangle shadow to the guy line.
Don\'t forget to be nervous!
We walked around with a few wrenches and tightened everyone.
To finish the touch, I connect the bottom of the LED electronics to the power supply.
The diamond LEDs at the top are attached to the battery pack-
So even if we turn off the generator at night, the diamond will turn on.
For the center tower, I used two 18\' long multi-colored, controllable LED strips, which I hung directly to the center of the tower with my back-to-back.
The skirt spread the light very well.
Finally, Matt Bush installed two projectors and started his software.
Before heading to playa, Matt designed the specific geometry of the shadow fabric in his software.
For example, note that even if the projection comes from the direction of the camera, there is no projection on the center pool.
Custom message

